
This article was updated in March 4, 2025 with new products and information by Mark S. Taylor
If your engine is running rough, stalling, or refusing to start, a dirty carburetor might be the problem. Learning how to clean a carburetor can fix fuel flow issues and get your engine running smoothly again. Over time, dirt and old fuel clog the jets and passages, making the engine struggle. In this guide, I’ll show you easy ways to clean it—whether you remove it or not. Let’s get started!
Contents
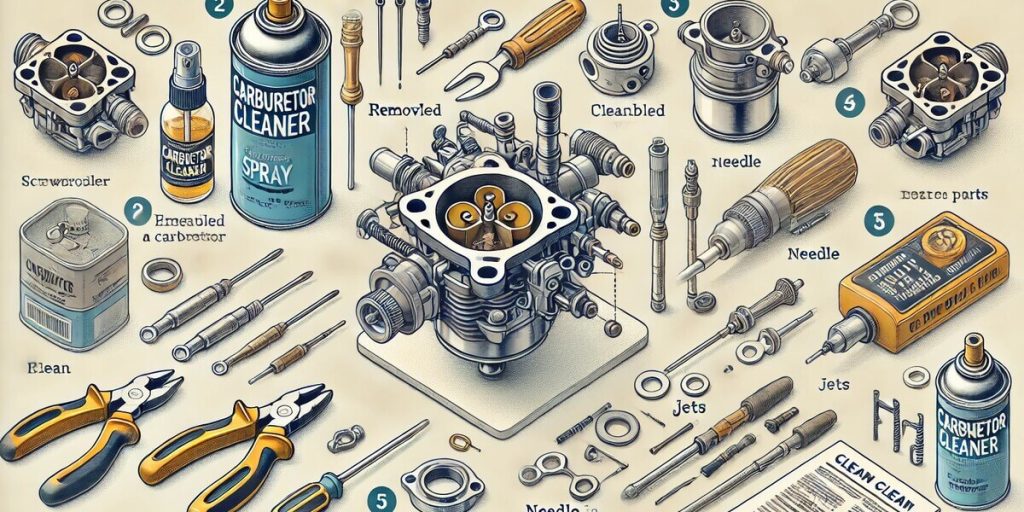
Tools & Materials You’ll Need to Clean a Carburetor
Let’s talk tools—because nothing’s worse than starting a job and realizing you’re missing something important. I’ve been there, thinking I could “figure it out,” only to waste time searching for the right tool. Save yourself the trouble and gather these essentials before you start.
First, you’ll need basic tools like screwdrivers, wrenches, and pliers. A flathead or Phillips screwdriver removes the air filter housing, while a wrench disconnects fuel lines. These are your go-to tools for taking apart the carburetor.
Next, grab cleaning supplies. A carburetor cleaner spray is a must—it dissolves gunk fast. Pair it with small brushes (an old toothbrush works great) and compressed air to clear out debris. If your carburetor is really clogged, an ultrasonic cleaner can work wonders. I used one on my lawn mower last year, and it felt like giving the carb a deep-clean spa treatment!
Safety gear is just as important. Wear gloves and eye protection, and work in a well-ventilated area. Carb cleaner fumes are no joke—I skipped gloves once and ended up with irritated skin. Never again!
👉 Quick tip: If you’re new to this, start with the basics—cleaner spray, brushes, and compressed air. You can upgrade to an ultrasonic cleaner later if needed.
Staying Safe While Cleaning a Carburetor
Let’s talk safety first—because trust me, I’ve learned the hard way how easy it is to skip this step and regret it later. One time, I was working in my garage with carb cleaner fumes everywhere, and by the end of it, I felt like I’d run a marathon just from breathing that stuff in. Lesson learned: always work in a well-ventilated area . Open a window, turn on a fan, or better yet, take your project outside if you can. Fresh air isn’t just a luxury; it’s a necessity when dealing with chemicals.
Now, carburetor cleaners are powerful tools, but they’re also highly flammable. Treat them like you would a campfire—respectful and cautious. Never smoke or have open flames nearby while using them. I once had a buddy who almost lit his workspace up because he forgot this rule. Scary stuff! Keep a fire extinguisher handy just in case—it’s better to be safe than sorry.
Protecting yourself is just as important as protecting your workspace. Always wear gloves and eye protection . The first time I skipped gloves, my hands were red and irritated for days. Not fun. And don’t forget those tiny parts! Carburetors have so many small screws and springs—they’re like puzzle pieces waiting to disappear. I use a magnetic tray or even a labeled piece of cardboard to keep everything organized. Trust me, trying to figure out where that one tiny screw goes is no one’s idea of a good time.
Quick tip: If you drop a small part (and you will), grab a flashlight and search immediately. It’ll save you hours of frustration later.
Step-by-Step Guide: How to Clean a Carburetor
Cleaning a carburetor might sound tricky, but it’s actually simple if you take it step by step. The first time I cleaned one, I was worried about messing it up. But once I laid out the parts and took my time, it wasn’t bad at all. Follow these steps, and you’ll have your engine running like new.
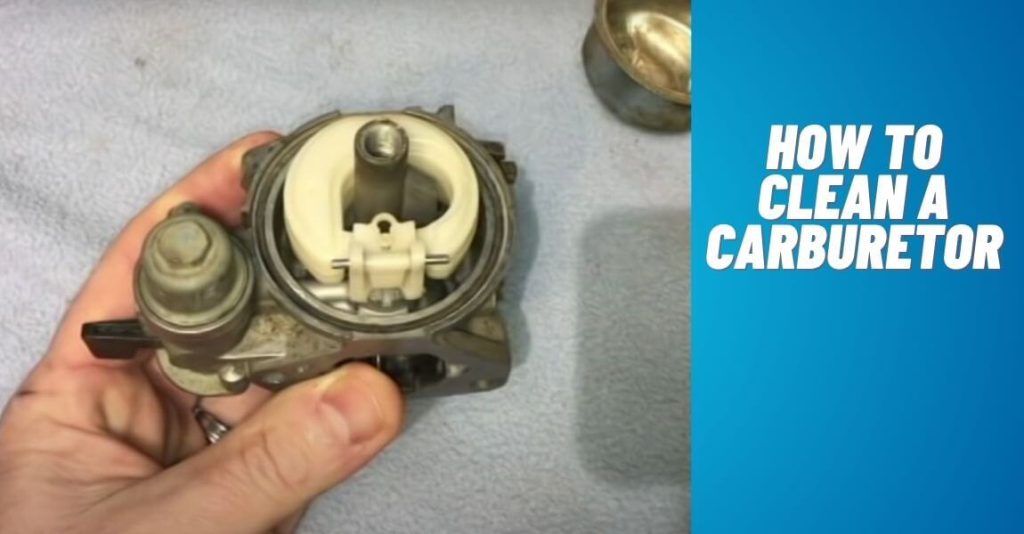
A. Removing the Carburetor (For Deep Cleaning)
First, turn off the engine and let it cool. A hot engine can burn you, so be patient. Find the carburetor—it’s usually near the air filter. Then, disconnect the fuel lines, throttle linkage, and air filter housing. Fuel might drip, so have a rag handy. Once it’s free, take the carburetor to your workspace.
👉 Quick tip: Snap a few pictures before removing anything. It’ll make putting it back together much easier.
B. Disassembling the Carburetor
Take off the bowl at the bottom of the carburetor. If you see gunk or sticky residue, that’s a sure sign it needs cleaning. Next, remove the float, needle, jets, and screws. These tiny parts are important, so lay them out neatly or use a small container to keep them from rolling away.
👉 Pro tip: A magnetic tray works great for holding small screws and jets.
C. Cleaning the Carburetor (Easy Methods)
Now, let’s get rid of the grime:
Carburetor Cleaner Spray: Spray inside the jets, fuel passages, and float bowl. Use a small brush or thin wire to clear out clogs.
Soaking in Carburetor Cleaning Solvent: If it’s really dirty, soak it for 15-30 minutes to break down tough buildup.
Ultrasonic Cleaner (For Deep Cleaning): This is great for motorcycles, chainsaws, and small engines. It cleans without scrubbing.
👉 Important: Never use sharp objects to poke inside jets—you could damage them.
D. Reassembling and Reinstalling the Carburetor
Make sure everything is completely dry before putting it back together. Reinstall the jets, float, and screws carefully. Then, reattach the carburetor to the engine and reconnect the fuel lines and throttle linkage. Finally, check for leaks before starting the engine.
👉 Final check: If the engine still runs rough, the jets may still be clogged. Try cleaning them again.
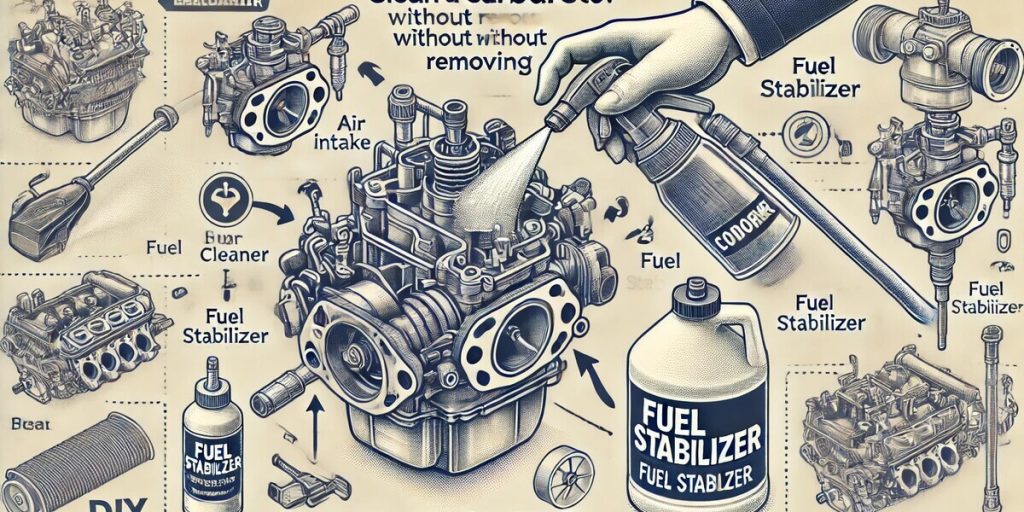
How to Clean a Carburetor Without Removing It
Taking apart a carburetor isn’t always necessary. If your engine is idling rough, sputtering, or losing power, a quick clean may do the trick. I’ve used this method when I didn’t have time for a full teardown, and it worked surprisingly well!
Step 1: Spray Cleaner into the Air Intake
Turn off the engine and remove the air filter. Grab a can of carburetor cleaner spray and aim it into the air intake. This helps break down light deposits and clogs inside the carburetor.
👉 Quick tip: Use a straw attachment for better control. It helps direct the spray exactly where it’s needed.
Step 2: Add Cleaner to the Fuel System
Pour a fuel additive or carb cleaner into the gas tank. As the engine runs, it will circulate through the fuel lines and jets, dissolving buildup along the way.
Step 3: Run the Engine to Flush Deposits
Start the engine and let it idle for a few minutes. Then, rev it a few times. You may see white smoke—that’s the cleaner burning off gunk.
👉 Final check: If your engine still runs rough, the carb might need a full cleaning. But for quick maintenance, this method can keep things running smoothly!
Carburetor Troubleshooting & Maintenance Tips
A carburetor can be tricky, but most problems have simple fixes. I’ve dealt with engines that wouldn’t start, sputtered at idle, or even flooded with fuel. If your engine is acting up, here’s how to spot common carburetor problems and keep it running smoothly.
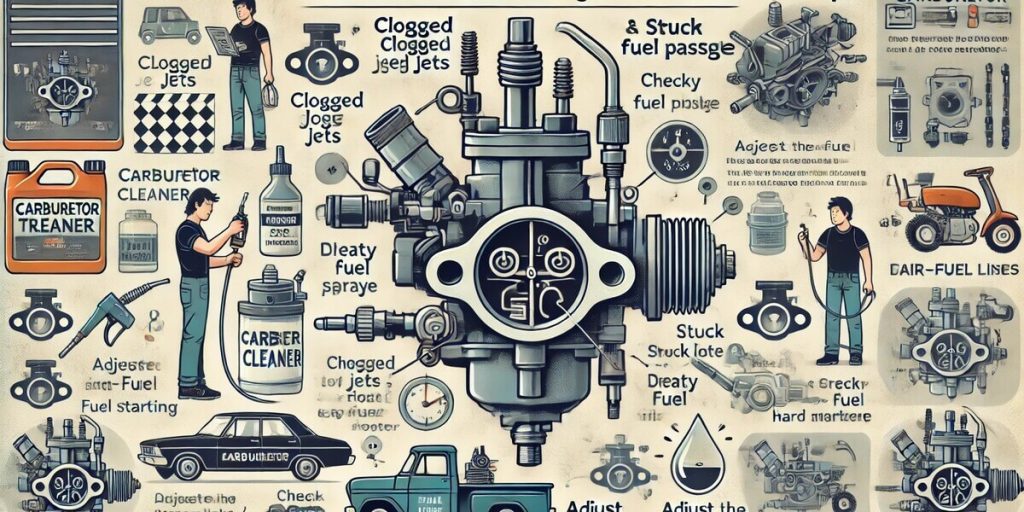
Common Carburetor Problems
Clogged jets block fuel flow, causing rough running or no start.
A stuck float can flood the engine or cut off fuel.
Poor idle makes the engine stall, surge, or struggle to stay running.
👉 Quick fix: Spray carburetor cleaner into the jets to remove dirt and buildup.
Symptoms of a Bad Carburetor
Hard starting – Too much or too little fuel can make it tough to start.
Rough idle – If the engine sputters or stalls, the carb may need cleaning or adjustment.
Black smoke – Too much fuel means the carb is running rich, often from a bad float or jet.
👉 Troubleshooting tip: If cleaning doesn’t help, check the idle screw for adjustments.
Regular Carburetor Maintenance
Use fresh fuel or add a stabilizer to prevent varnish buildup.
Drain fuel before storage to avoid clogging jets with old gas.
Run the engine monthly to keep fuel flowing and prevent drying out.
👉 Pro tip: I let my engines run for 5–10 minutes each month to keep the carburetor clean and ready to go.
FAQs: Carburetor Cleaning & Maintenance
How do you clean a carburetor on a pressure washer?
Turn off the engine and remove the air filter. Spray carburetor cleaner into the intake while the engine is off. Let it sit for a few minutes, then start the engine and let it run to flush out debris.
What’s the best way to unclog a carburetor jet?
Remove the jet and soak it in carburetor cleaner for a few minutes. Use a fine wire or compressed air to clear any blockages. Reinstall and test the engine.
Can I clean a carburetor without taking it apart?
Yes! Use carburetor cleaner spray through the air intake and add a fuel additive to the gas tank. Run the engine to break down minor deposits.
What’s the best carburetor cleaner spray?
Popular choices include Gumout, Berryman B-12, and CRC Carb Cleaner. Look for a cleaner that removes varnish, gum, and carbon buildup effectively.
How often should I clean my carburetor?
Clean it every season or when you notice rough idling, stalling, or power loss. Use fuel stabilizers to keep it cleaner for longer.
My Final Thoughts on How to Clean a Carburetor
If your engine is running rough or won’t start, cleaning the carburetor might be the fix. It sounds complicated, but with the right tools and a little patience, it’s totally doable. I’ve saved plenty of engines—lawnmowers, motorcycles, even pressure washers—just by tackling a dirty carb.
The key is regular maintenance. Using fresh fuel, running the engine often, and giving the carb a quick spray can keep it from clogging. Trust me, a little effort now saves you a lot of frustration later.
Got a carburetor story or question? Drop it in the comments—I’d love to help!