
This article was updated in August 11, 2023 with new products and information by Mark S. Taylor
To clean a rear view camera, gently wipe the lens with a soft, lint-free cloth. In doing so, you can remove any dirt or smudges that may be affecting the camera’s clarity and performance.
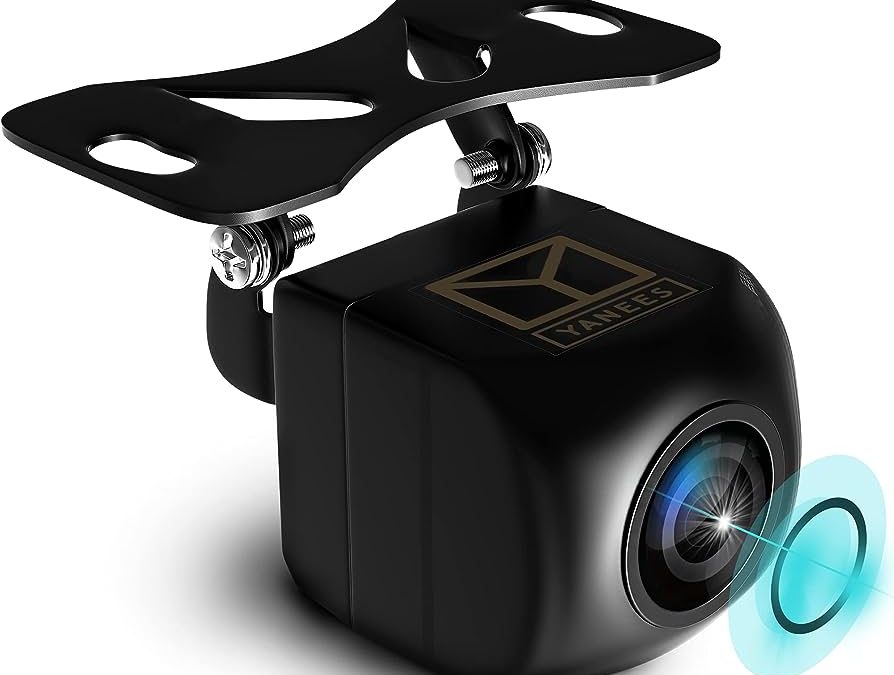
A rear view camera is a valuable tool in modern vehicles, providing drivers with a clear view of their surroundings while reversing. However, over time, the camera lens can become dirty or smudged, compromising its effectiveness. To ensure optimal performance, it is essential to clean the rear view camera regularly.
We will guide you on how to clean your rear view camera effectively. By following these steps, you can maintain a clean and clear camera lens, ensuring a safe and reliable driving experience.
Contents
Importance Of Cleaning Your Rear View Camera
The Impact Of A Dirty Rear View Camera On Visibility
A dirty rear view camera can have a significant impact on your visibility while driving, compromising both your safety and the safety of other road users. Here are some key points to consider:
- Reduced clarity: Dust, dirt, and debris can accumulate on the lens of your rear view camera, hindering its ability to provide a clear view of what is behind your vehicle. This can make it difficult to see obstacles, pedestrians, or other vehicles, increasing the risk of accidents.
- Impaired judgment: A dirty camera may distort the image it captures, making it hard to accurately judge distances. This not only affects parking and reversing maneuvers but can also lead to misjudgments when changing lanes or merging with traffic.
- Limited night vision: Many rear view cameras come equipped with night vision capabilities to ensure optimal visibility during low-light conditions. However, when the camera is dirty, the effectiveness of night vision is compromised, making it harder to see in the dark and potentially increasing the chances of collisions.
Preventing Accidents And Improving Driving Safety
Regularly cleaning your rear view camera is essential for preventing accidents and enhancing your overall driving safety. Consider the following points:
- Clear and unobstructed view: By keeping your camera lens clean, you can ensure a clear and unobstructed view of the area behind your vehicle. This allows you to detect potential hazards promptly and react accordingly, reducing the risk of collisions.
- Enhanced maneuvering: Whether you’re parking, reversing, or changing lanes, a clean rear view camera provides you with accurate visual feedback. This makes it easier to navigate tight spaces, execute precise maneuvers, and avoid potential conflicts with other vehicles or pedestrians.
- Peace of mind: A clean rear view camera offers you peace of mind while on the road. When your visibility is optimized, you can drive with confidence, knowing that you have a reliable tool to assist you in making safer decisions.
Maintenance Tips For Optimal Camera Performance
To ensure your rear view camera delivers optimal performance, incorporating these maintenance tips can make a difference:
- Regular cleaning: Clean the camera lens regularly using a soft, lint-free cloth or microfiber towel. Avoid harsh chemicals or abrasive materials that can scratch the lens.
- Check for damage: Inspect the camera housing for any signs of damage such as cracks or water ingress. If you notice any issues, have them addressed promptly to maintain the camera’s functionality.
- Avoid harsh conditions: Whenever possible, park your vehicle in sheltered areas to protect the rear view camera from extreme weather conditions and excessive exposure to sunlight.
- Be mindful when washing your vehicle: Take care when washing your vehicle to prevent water or cleaning agents from directly hitting the camera lens. Shield it with your hand or use a gentle spray.
- Regular system checks: Besides cleaning the lens, it’s essential to periodically check the camera system, including the wiring and connections, to ensure everything is in proper working order.
By prioritizing the cleanliness and maintenance of your rear view camera, you can maximize its effectiveness, improve your visibility, and ultimately enhance your driving safety on the road.
Tools And Materials Needed For Cleaning
Cleaning the rear view camera is an important maintenance task that ensures clear visibility while driving. To get started, gather these essential tools and materials:
- Microfiber cloth: This lint-free cloth is perfect for wiping away dirt, smudges, and fingerprints on the camera lens without leaving any scratches.
- Alcohol wipes or cleaning solution: For tougher stains or residue, alcohol wipes or a gentle cleaning solution can be used. Make sure the solution is suitable for electronic devices and won’t damage the camera.
- Compressed air canister: Use a can of compressed air to remove loose debris and dust particles from the camera and its surrounding area. This helps prevent them from affecting the camera’s performance.
- Soft brush or toothbrush: A soft brush or toothbrush is handy for gently loosening and removing stubborn dirt or grime from the camera housing or crevices.
Remember to follow these tips to ensure a proper cleaning process for your rear view camera. With the right tools in hand, you’ll be ready to tackle this task and enjoy clear and unobstructed views while driving.
Step-By-Step Cleaning Process
Cleaning your rear view camera is essential to ensure clear visibility while reversing your vehicle. By following a simple step-by-step process, you can effectively remove dust, dirt, and debris from the camera lens, enhancing its performance. Here’s how:
Preparing The Necessary Tools And Materials
Before beginning the cleaning process, gather the following tools and materials:
- Soft brush: Use a gentle, soft-bristled brush to remove loose dust and dirt from the camera.
- Microfiber cloth: Choose a lint-free, microfiber cloth to wipe the camera lens.
- Cleaning solution: Opt for a mild cleaning solution specifically designed for electronic devices.
- Compressed air: Utilize compressed air to dislodge hard-to-reach debris or moisture.
Safely Locating And Accessing The Rear View Camera
To locate and access the rear view camera, follow these steps:
- Refer to your vehicle’s owner manual to determine the camera’s location.
- Typically, the camera is positioned near the rear license plate or on the trunk lid.
- Ensure the vehicle is parked in a safe area before attempting to clean the camera.
Gently Removing Dust And Dirt Using A Soft Brush
To remove dust and dirt from the camera, follow these steps:
- Dip the soft brush in a cleaning solution or gently tap it to remove any excess dirt.
- Using light strokes, gently brush away any accumulated dust or dirt from the camera lens.
- Pay attention to the corners and edges, as these areas tend to accumulate more debris.
Wiping The Camera Lens With A Microfiber Cloth And Cleaning Solution
To clean the camera lens, follow these steps:
- Dampen a microfiber cloth with a small amount of the cleaning solution.
- Carefully wipe the camera lens in a circular motion, ensuring thorough coverage.
- Regularly inspect the cloth for dirt or debris and use a clean area for each wipe.
Utilizing Compressed Air To Remove Hard-To-Reach Debris Or Moisture
If there are stubborn debris or signs of moisture, utilize compressed air in the following way:
- Take the compressed air canister and point it towards the camera lens.
- Spray short bursts of compressed air to dislodge any hard-to-reach debris or moisture.
- Pay attention to maintaining a safe distance to prevent damage to the camera.
Ensuring The Camera Is Completely Dry Before Reassembling
To ensure the camera is dry and ready for reassembly, follow these steps:
- Allow the camera lens to air dry for a few minutes in a clean, dry environment.
- Avoid using a cloth or any other material to dry the camera, as it may leave lint or scratches.
- Once the camera is completely dry, carefully reassemble any removed parts following the manufacturer’s instructions.
By following these simple steps, you can effectively clean your rear view camera, enhancing its performance and ensuring clear visibility while reversing your vehicle. Regular maintenance and cleaning will prolong the life of your camera and provide you with a safer driving experience.
Tips And Precautions For Effective Cleaning
Cleaning your rear view camera is an essential task to ensure optimal performance and safety on the road. Regular maintenance not only improves visibility but also prevents potential accidents. However, it’s crucial to follow certain tips and precautions to avoid damaging the camera or its components.
Avoid Using Abrasive Materials That May Scratch The Camera Lens:
- Opt for soft microfiber cloths or lens cleaning wipes to carefully remove dirt, dust, and smudges.
- Never use rough or abrasive materials like paper towels, scrub brushes, or harsh chemicals as they can scratch the lens and affect the camera’s functionality.
- Gently wipe the lens in a circular motion to ensure even cleaning without applying excessive pressure.
Use Alcohol Wipes Sparingly And Ensure They Don’T Damage Any Other Components:
- Alcohol wipes can be useful for removing stubborn dirt or fingerprints, but use them sparingly.
- Check the manufacturer’s guidelines to confirm if alcohol wipes are safe to use on your specific rear view camera model.
- Avoid contact with sensitive parts like the camera’s wiring or connectors, as alcohol may cause damage.
- If using alcohol wipes, ensure they are moist but not dripping wet, and be extra cautious during application.
Be Cautious When Handling Electrical Connections During The Cleaning Process:
- Before cleaning, turn off the vehicle’s power to reduce the risk of electrical shock or camera malfunction.
- If necessary, disconnect the camera’s power source or remove the fuse to eliminate any potential electrical hazards.
- Carefully clean around the camera’s electrical connections, avoiding any excessive force or movement.
- After cleaning, reattach the connections securely, ensuring a tight fit to maintain proper functionality.
Regularly Check For Any Signs Of Damage Or Malfunction After Cleaning:
- Inspect the camera lens, housing, and mounting brackets for any cracks, corrosion, or signs of wear.
- Ensure that all the camera components are securely in place and that there are no loose connections.
- Test the camera functionality by switching it on and observing the display for clarity and accuracy.
- If there are any signs of damage or malfunction, consult a professional or the camera’s manufacturer for repair or replacement options.
Remember, maintaining a clean and functional rear view camera is essential for a safe driving experience. By following these tips and precautions, you can effectively clean your camera without risking any damage and ensure clear visibility while on the road.
Stay diligent in your cleaning routine, and always prioritize safety.
Common Cleaning Mistakes To Avoid
When it comes to cleaning your rear view camera, it’s important to exercise caution and avoid common cleaning mistakes that can potentially damage the camera or compromise its functionality. By following the correct cleaning practices, you can ensure your rear view camera remains in optimal condition, providing you with clear and unobstructed visibility.
Let’s take a look at some common cleaning mistakes to avoid:
Using Rough Or Abrasive Materials That Can Damage The Camera Lens
Using rough or abrasive materials to clean the camera lens can lead to scratches and damage. To prevent this, opt for soft and non-abrasive cleaning materials. Avoid using paper towels, rough cloths, or abrasive cleaners. Instead, use a microfiber cloth or lens cleaning solution specifically designed for camera lenses.
- Microfiber cloth: It is gentle on the camera lens and effectively removes dust, smudges, and fingerprints.
- Lens cleaning solution: Use a few drops of lens cleaning solution on the microfiber cloth to achieve a thorough clean without damaging the lens.
Applying Excessive Pressure While Cleaning, Potentially Affecting Camera Alignment
Applying excessive pressure while cleaning the rear view camera can impact its alignment and functionality. To avoid this, always clean the camera with a gentle touch.
- Gentle circular motions: Use gentle circular motions when cleaning the camera lens to remove any dirt or smudges.
- Avoid pressing too hard: Apply only light pressure to avoid misaligning the camera or causing damage.
Neglecting To Dry The Camera Thoroughly, Leading To Moisture Or Condensation Issues
After cleaning the rear view camera, it’s crucial to ensure it is thoroughly dried to prevent moisture or condensation buildup that can affect its performance.
- Air drying: Allow the camera to air dry completely before reconnecting or using it again.
- Remove excess moisture: Use a dry cloth or compressed air to remove any remaining moisture.
Skipping Regular Maintenance And Cleaning Intervals, Resulting In Compromised Visibility
Regular maintenance and cleaning intervals are essential for ensuring the optimal performance and visibility of your rear view camera. Neglecting this can lead to compromised visibility and potential issues.
- Follow manufacturer’s recommendations: Check the camera’s user manual or manufacturer’s website for recommended cleaning intervals and maintenance guidelines.
- Regular check-ups: Periodically inspect the camera for any signs of dirt, debris, or damage, and clean accordingly.
By avoiding these common cleaning mistakes and following the proper cleaning practices, you can keep your rear view camera in excellent condition, ensuring clear and reliable visibility while on the road. Remember, a clean camera is a safe camera!
Additional Maintenance Tips For Optimal Rear View Camera Performance
Rear view cameras have become an essential feature in modern vehicles, providing valuable assistance while reversing. To ensure optimal performance and longevity of your rear view camera, regular maintenance is necessary. In addition to cleaning the camera lens, there are a few other maintenance tips that can help keep your rear view camera in top shape.
Let’s explore these additional maintenance tips in detail.
Checking For Firmware Or Software Updates For Improved Functionality
- Stay current: Stay updated with the latest firmware or software updates provided by your camera’s manufacturer. These updates often come with improvements in functionality, performance, and even bug fixes.
- Improved experience: Regularly checking for updates ensures that you have the best possible experience with your rear view camera. It can also enhance the camera’s compatibility with newer devices or operating systems.
- Manufacturer support: Contact your camera manufacturer’s customer support or visit their website to check for any available updates. Follow their instructions to install the updates correctly.
Inspecting And Cleaning Connectors Or Wires For Any Signs Of Corrosion Or Damage
- Maintain connectivity: Over time, connectors or wires of the rear view camera system can develop corrosion or get damaged. Regular inspection is crucial to ensure proper connectivity and functionality.
- Visual examination: Inspect the connectors and wires for any signs of corrosion, rust, loose connections, or physical damage. Ensure that the connectors are securely connected and without any obstruction.
- Cleaning process: If you notice any corrosion or dirt build-up, gently clean the connectors using a wire brush or a soft cloth. Avoid using abrasive materials or excessive force that could further damage the connectors.
Protecting The Camera From Extreme Weather Conditions Or Harsh Environments
- Shield from elements: Extreme weather conditions such as excessive heat, cold, rain, or snow can have a detrimental effect on the rear view camera’s performance. Protecting it from these elements is crucial for its longevity.
- Cover options: Consider using a protective cover or housing for the camera to shield it from direct exposure to harsh weather conditions. These covers are often available for specific camera models and can provide an added layer of protection.
- Parking considerations: Park your vehicle in covered or shaded areas whenever possible to minimize exposure to extreme temperatures and adverse weather conditions.
Seeking Professional Assistance If Experiencing Persistent Camera Issues
- Noteworthy problems: If you encounter persistent issues with your rear view camera, such as distorted images or complete malfunction, it is advisable to seek professional assistance.
- Expert diagnosis: Professional technicians have the expertise and equipment to diagnose and troubleshoot intricate camera issues accurately. They can pinpoint the problem and suggest appropriate solutions.
- Manufacturer support: Reach out to the camera’s manufacturer or authorized service centers for guidance and assistance. They can provide specialized support tailored to your camera model.
By following these additional maintenance tips, you can ensure that your rear view camera operates optimally and continues to provide you with the convenience and safety it was designed to deliver. Regularly checking for updates, inspecting connectors and wires, protecting the camera from extreme weather conditions, and seeking professional assistance when needed will help maintain the performance and longevity of your rear view camera.
Frequently Asked Questions For How To Clean Rear View Camera
How Often Should I Clean My Rear View Camera?
It is recommended to clean your rear view camera every month to ensure clear visibility. Regular cleaning helps prevent dirt and debris from obstructing the camera’s view, ensuring optimal performance.
What Is The Best Way To Clean A Rear View Camera?
To clean your rear view camera, gently wipe the lens with a microfiber cloth dampened with a mild cleaning solution. Avoid using abrasive materials or harsh chemicals that may damage the lens or camera.
Can I Use Water To Clean My Rear View Camera?
While water can be used to clean the exterior surface of the rear view camera, it is important to avoid getting water inside the camera housing or directly on the lens. Use a damp cloth to gently wipe away any dirt or grime from the camera.
How Do I Prevent Smudges On My Rear View Camera Lens?
To prevent smudges on your rear view camera lens, avoid touching it directly with your fingers. If you need to clean the lens, use a microfiber cloth or lens cleaning solution specifically designed for cameras to ensure a clear and smudge-free view.
What Should I Do If My Rear View Camera Is Not Working After Cleaning?
If your rear view camera is not working after cleaning, check the connections to ensure they are secure. If the issue persists, consult your vehicle’s manual or contact a professional technician for further assistance.
Conclusion
To sum up, cleaning your rear view camera is an essential maintenance task that shouldn’t be overlooked. By following the simple steps mentioned earlier, you can ensure that your camera remains in top-notch condition for optimal performance. Regularly wiping off any dirt or debris, using a gentle cleaning solution, and being careful not to damage any delicate parts will go a long way in keeping your camera functional and clear.
Remember to exercise caution when handling the camera and always refer to the manufacturer’s instructions for specific cleaning recommendations. With a clean camera lens, you can have peace of mind knowing that you’ll have a clear view of what’s behind you while driving, promoting safety on the road.
Don’t neglect this simple yet important aspect of car maintenance and enjoy a clear and unobstructed view from your rear view camera.