
This article was updated in November 8, 2025 with new products and information by Mark S. Taylor
xing a sun visor in your car can seem tricky, but it’s often simple. A few steps can get it back in place.
Is your sun visor loose, broken, or won’t stay up? Learn simple DIY fixes like tightening a screw or using a repair kit. For bigger issues like a failed mirror or light, find out the cost to replace it and where to buy a new one for your specific car model, from Honda Civics to Ford F150s.
With some basic tools and a little effort, you can handle this task yourself. This guide will walk you through the process, ensuring your visor is secure and functional again. Whether it’s a quick tightening or a more involved repair, you’ll find the solution here. Let’s get started on fixing that sun visor and improving your driving experience.
Contents
Common Sun Visor Problems
The sun visor in your car is crucial for blocking bright sunlight. It helps you see the road clearly. But what happens when it fails? Common sun visor problems can make driving uncomfortable. Let’s explore some common issues and how to fix them.
Loose Visor
A loose visor can be very annoying. It may keep falling down and obstructing your view. This usually happens due to worn-out screws or hinges.
Here’s how to fix a loose visor:
- First, inspect the screws. Use a screwdriver to tighten them.
- If the screws are stripped, replace them with new ones.
- Check the visor clip. If it’s loose, tighten it as well.
Sometimes, the entire visor assembly may need adjustment. Here’s a quick guide:
- Remove the visor from its mount.
- Inspect the mounting bracket.
- If the bracket is loose, tighten the bolts holding it.
- Reattach the visor to the mount.
In some cases, you may need to replace the visor. Here’s a table with common tools you might need:
| Tool | Purpose |
|---|---|
| Screwdriver | Tighten or remove screws |
| Replacement Screws | Replace worn-out screws |
| Wrench | Tighten bolts |
Broken Clip
A broken clip can make the visor useless. It won’t stay in place. Fixing a broken clip is simple but requires some tools.
Follow these steps to replace a broken clip:
- First, buy a new clip compatible with your car model.
- Remove the screws holding the broken clip.
- Take out the broken clip from the visor.
- Position the new clip in place.
- Screw it in securely.
Sometimes, the clip may be riveted instead of screwed. Here’s what to do:
- Use a drill to remove the rivets.
- Take out the broken clip.
- Position the new clip where the old one was.
- Use a rivet gun to attach the new clip.
Here’s a list of tools you might need for this task:
- New visor clip
- Screwdriver or drill
- Rivet gun (if clip is riveted)
- Replacement rivets or screws
With the right tools and steps, you can fix these common sun visor problems in no time. Enjoy a safer, more comfortable drive!
Tools Required
Sun visors are essential for blocking direct sunlight while driving. If your sun visor is broken or loose, fixing it yourself can save money. This guide will help you understand the tools required for the job.
Screwdriver
A screwdriver is a crucial tool for fixing a sun visor. Most sun visors are attached to the car’s interior with screws. You will need a screwdriver to remove these screws. Here are some types of screwdrivers you might need:
- Phillips head screwdriver: This is the most common type used in cars. It has a cross-shaped tip.
- Flathead screwdriver: This has a flat tip and is used for screws with a single slot.
- Torx screwdriver: Some cars use Torx screws, which have a star-shaped pattern.
Using the right screwdriver is essential. It ensures you do not strip the screws. Stripped screws can be difficult to remove and may require additional tools.
Here is a quick table to help you choose the right screwdriver:
| Type of Screw | Required Screwdriver |
|---|---|
| Phillips | Phillips head screwdriver |
| Flathead | Flathead screwdriver |
| Torx | Torx screwdriver |
Keep a set of screwdrivers in your toolbox. It will help you handle any type of screw you encounter. Always use the correct size and type to avoid damage.
Replacement Parts
Sometimes, you may need to replace parts of the sun visor. These parts could include the visor itself, clips, or the arm. Here are some common replacement parts:
- Sun visor: If the visor is damaged or worn out, you may need a new one.
- Clips: These hold the visor in place when it is not in use. Broken clips can cause the visor to hang loosely.
- Sun visor arm: This is the part that attaches the visor to the car. If it is broken, the visor will not stay in place.
When buying replacement parts, ensure they match your car’s model. Here are some tips:
- Check your car’s manual for part numbers.
- Visit an auto parts store with your car’s details.
- Order parts online from reputable sellers.
Replacement parts usually come with instructions. Follow them carefully to install the parts correctly. If you are unsure, seek help from a professional.
Having the right replacement parts ensures your sun visor works like new. It also improves driving safety by blocking sunlight effectively.
Safety Precautions
Fixing the sun visor in your car might seem like a simple task. Still, it’s important to follow safety precautions to avoid any accidents or injuries. Taking a few extra minutes to prepare can make the process smooth and safe. Let’s look at two important safety steps you should follow: disconnecting the battery and wearing safety goggles.
Disconnect Battery
Before you start fixing the sun visor, it’s crucial to disconnect the car battery. This step ensures that you won’t accidentally trigger any electrical components while you work. Here’s how to do it:
- Park your car in a safe area and turn off the engine.
- Open the hood and locate the battery. It’s usually in the front of the car.
- Use a wrench to loosen the nut on the negative terminal (marked with a minus sign, “-“).
- Remove the cable from the negative terminal and secure it away from the battery.
- Repeat the process for the positive terminal (marked with a plus sign, “+”).
By disconnecting the battery, you prevent any electrical shocks or short circuits. This is especially important if your sun visor has electrical components like lights or mirrors. Remember, safety first!
Wear Safety Goggles
Wearing safety goggles is another important precaution. Your eyes are sensitive and need protection from dust, debris, or any sharp objects that could fly off during the repair. Here’s why you should wear safety goggles:
| Reason | Explanation |
|---|---|
| Protects from Debris | Small particles can cause serious eye injuries. |
| Prevents Scratches | Screws and tools can accidentally scratch your eyes. |
| Improves Visibility | Clear vision helps you work more accurately. |
Always wear safety goggles before you start any repair work. They are inexpensive and can save you from potential harm. Make sure the goggles fit well and are comfortable to wear for the duration of the repair.
By following these safety precautions, you ensure that the process of fixing your sun visor is not only effective but also safe. Your well-being is the most important aspect of any DIY project.
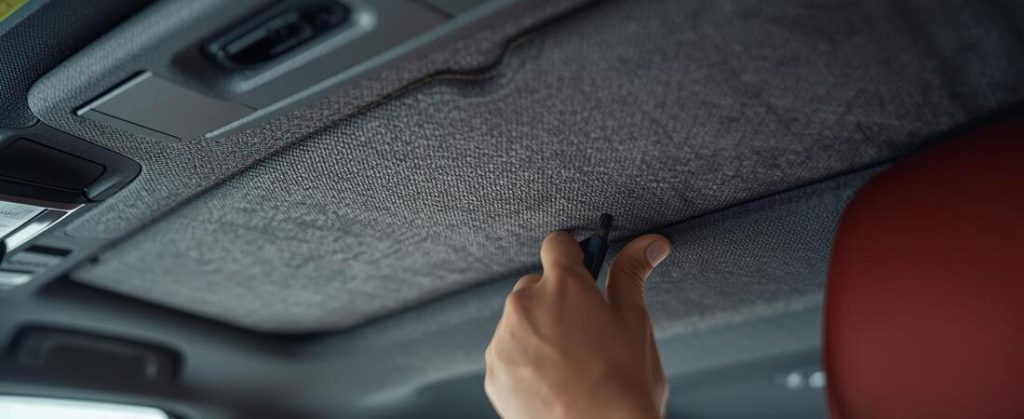
Removing The Sun Visor
Fixing a sun visor in your car can seem daunting, but with the right steps, it’s quite manageable. An essential part of this process is removing the sun visor. This step involves unscrewing the mount and detaching the wires if your visor has lights or other electrical components. Let’s dive into the specifics.
Unscrewing The Mount
The first step in removing the sun visor is to unscrew the mount. The mount is where the visor attaches to the ceiling of your car. Here’s a simple guide:
- Locate the screws: Look for the screws that hold the visor in place. These are usually hidden under a cover or flap.
- Use the right screwdriver: A Phillips head screwdriver is commonly used. Ensure it fits well to avoid stripping the screws.
- Remove the screws: Turn the screwdriver counterclockwise to loosen and remove the screws. Keep them safe; you’ll need them for reinstallation.
For a clearer understanding, here’s a table showing the typical tools and steps:
| Step | Tool | Description |
|---|---|---|
| Locate Screws | N/A | Find the screws under the visor mount cover. |
| Choose Screwdriver | Phillips Head | Select a screwdriver that fits the screws well. |
| Remove Screws | Phillips Head | Turn counterclockwise to remove the screws. |
Once the screws are removed, the visor will be loose. Hold it with one hand while you finish unscrewing to prevent it from falling.
Detaching Wires
If your car’s sun visor has electrical components like lights or mirrors, you’ll need to detach the wires. Follow these steps:
- Locate the wires: Check where the visor connects to the ceiling. You should see wires leading from the visor into the car’s electrical system.
- Disconnect the connector: Most visors have a connector that you can unplug. This connector is usually a simple clip that you press to release.
- Use gentle force: If the connector is tight, wiggle it gently. Avoid pulling hard as this may damage the wires.
Here’s a simplified view of the steps:
| Step | Description |
|---|---|
| Locate Wires | Find where the visor connects to the car’s electrical system. |
| Disconnect Connector | Unplug the connector by pressing the clip. |
| Use Gentle Force | Wiggle the connector gently to avoid damage. |
With the wires detached, you can now completely remove the sun visor from the car. Keep the wires and screws safe for reinstallation. This process ensures that your sun visor can be fixed or replaced without damaging the car’s interior.
Repairing Loose Visor
Sun visors in cars play an important role in driving comfort. They shield your eyes from the sun and can also hold essential documents or accessories. Over time, these visors can become loose, making them less effective. Repairing a loose visor can be a simple task if you know what to do. This guide will help you fix a loose sun visor by tightening screws and reinforcing the clip.
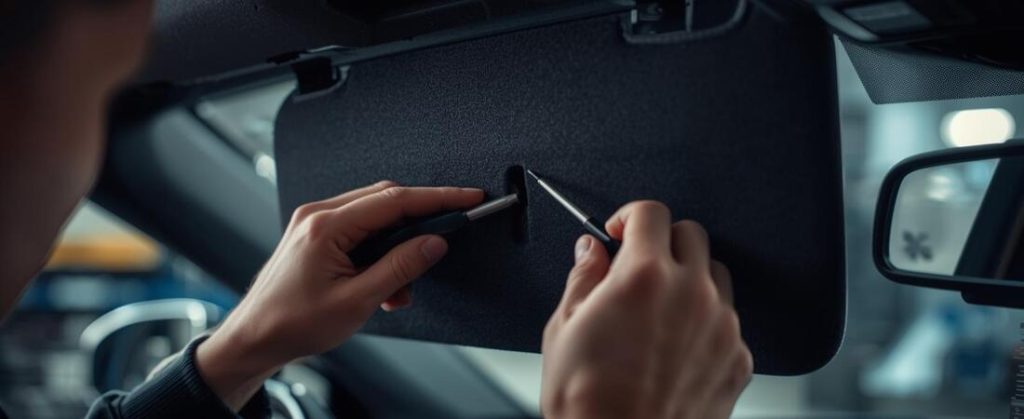
Tightening Screws
One common reason for a loose sun visor is that the screws holding it in place have become loose. Tightening these screws can often solve the problem. Here’s how you can do it:
- First, locate the screws on your sun visor. These are usually found where the visor attaches to the roof of the car.
- Use a screwdriver that fits the screws. This could be a Phillips head or a flathead screwdriver, depending on your car model.
- Turn the screws clockwise to tighten them. Be careful not to over-tighten, as this can strip the screws or damage the visor.
- Check the visor to see if it is still loose. If it is, you may need to replace the screws with slightly larger ones.
Sometimes, the screws might be hidden under a plastic cover. If this is the case, gently pry off the cover with a flat tool. Here’s a table to help you with the steps:
| Step | Action |
|---|---|
| 1 | Locate the screws |
| 2 | Choose the right screwdriver |
| 3 | Tighten the screws |
| 4 | Check the visor |
By following these steps, you can often fix a loose sun visor quickly and easily.
Reinforcing Clip
If tightening the screws doesn’t fix the problem, the clip that holds the visor in place might be worn out. Reinforcing or replacing this clip can make a big difference. Here’s how to do it:
- Inspect the clip to see if it is broken or damaged. The clip is usually located where the visor attaches to the headliner.
- If the clip is broken, you will need to replace it. Purchase a replacement clip that matches your car model.
- To remove the old clip, use a flat tool to pry it off. Be gentle to avoid damaging the headliner.
- Install the new clip by pushing it into place. Make sure it is secure.
Sometimes, the clip might just be loose. In that case, you can reinforce it with some strong adhesive or double-sided tape. Here’s a quick guide to help you:
| Step | Action |
|---|---|
| 1 | Inspect the clip |
| 2 | Remove the old clip |
| 3 | Install the new clip |
| 4 | Reinforce with adhesive if needed |
Reinforcing the clip can make your sun visor much more stable. This will improve your driving experience and safety.
Replacing Broken Parts
Sun visors are essential for driving comfort and safety. They shield our eyes from the blinding sun. But what if your sun visor breaks? Replacing broken parts can fix the issue. Let’s dive into finding the right parts and installing a new clip.
Finding Compatible Parts
First, ensure you get compatible parts. Start by checking your car’s make, model, and year. Many visors fit specific car types. Visit a local auto parts store or check online. Look for parts that match your car’s specifications. Having the right tools helps too.
Here is a simple checklist to follow:
- Identify your car’s make, model, and year.
- Search for sun visors that fit your car.
- Check product reviews for quality and compatibility.
- Purchase the necessary tools for installation.
Some parts to consider:
| Part | Description |
|---|---|
| Sun Visor | The main part that blocks the sun. |
| Clip | Holds the visor in place. |
| Mounting Bracket | Connects the visor to the car. |
Make sure to double-check compatibility before buying. This ensures the parts fit perfectly. Avoid mismatched parts to prevent further issues.
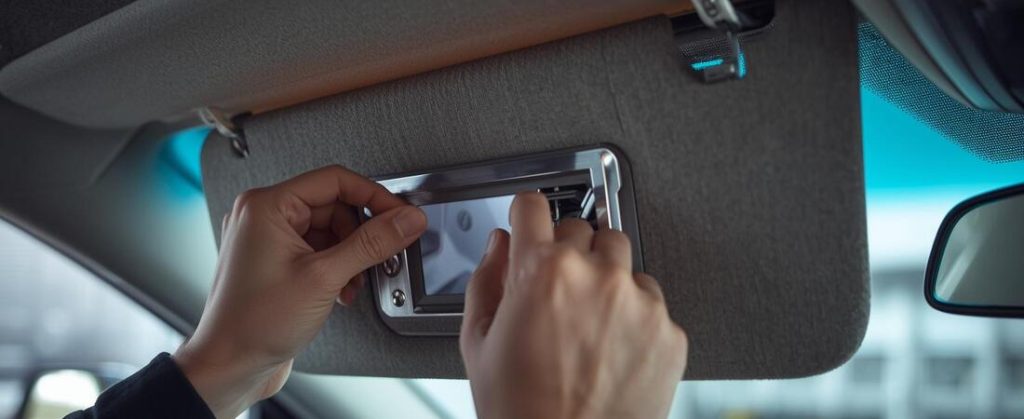
Installing New Clip
After finding the right parts, it’s time to install the new clip. Follow these steps for a smooth installation:
- Remove the old clip carefully. Use a screwdriver if needed.
- Clean the area where the new clip will go. Dust and debris can cause poor adhesion.
- Align the new clip with the mounting holes. Make sure it fits perfectly.
- Secure the new clip with screws. Tighten them firmly but avoid over-tightening.
- Test the new clip by attaching the sun visor. Ensure it moves smoothly.
Remember to be gentle. Force can damage the new parts. Double-check everything. Make sure the visor is secure and functional.
For a better fit, use manufacturer-recommended clips. This guarantees a snug fit and long-lasting performance. Happy fixing!
Reinstalling The Sun Visor
Fixing the sun visor in your car can seem like a daunting task. Whether the visor is loose, broken, or just not working right, reinstalling it is a key step. A properly reinstalled sun visor ensures safety and comfort while driving. Below, we will go through the steps to reinstall the sun visor correctly.
Aligning Properly
Proper alignment of the sun visor is crucial for its functionality. Misaligned visors can be ineffective and may obstruct your view.
Follow these steps for proper alignment:
- First, check the visor’s mount on the car’s ceiling.
- Ensure the mounting bracket is not damaged.
- Place the visor in its intended position.
- Make sure the visor’s arm fits snugly into the bracket.
Here’s a quick alignment checklist:
| Step | Action |
|---|---|
| 1 | Inspect mounting bracket for damage |
| 2 | Place visor in position |
| 3 | Ensure arm fits snugly |
A well-aligned sun visor should move smoothly. Test its range of motion. Adjust as needed to ensure it covers the sun effectively. Proper alignment helps in reducing glare and enhances driving safety.
Securing With Screws
Once aligned, securing the sun visor with screws is the next step. This ensures the visor stays in place during use.
Here’s a step-by-step guide:
- Gather the necessary tools: a screwdriver and the appropriate screws.
- Position the visor in the mounting bracket.
- Insert the screws into the holes on the bracket.
- Use the screwdriver to tighten the screws. Do not overtighten as it can strip the screw holes.
Double-check the following:
- All screws are secure and tight.
- The visor does not wobble or move excessively.
- Test the visor by moving it up and down.
A secure sun visor should feel firm. If it feels loose, check each screw again. Tighten them carefully. Ensuring the screws are secure prevents the visor from falling or obstructing your view while driving.
Reinstalling your sun visor properly improves your driving experience. Follow these steps for a safe and effective repair.
Testing Functionality
Fixing a sun visor in your car can be straightforward if you follow the right steps. Once you’ve repaired or replaced the sun visor, the next crucial step is testing its functionality. This ensures it works correctly and won’t cause issues while driving. Let’s dive into the details of testing the functionality by checking its movement and ensuring its stability.
Checking Movement
After fixing the sun visor, the first step is to check its movement. Ensure the sun visor moves smoothly and without resistance. Here’s how you can do this:
- Lift and Lower: Gently lift and lower the sun visor. It should move without sticking or making unusual noises.
- Side to Side: Move the sun visor from one side to the other. It should slide smoothly along its track.
- Full Range: Ensure the visor can cover its full range of motion, protecting you from the sun at different angles.
If the visor does not move smoothly, check for any obstructions or misalignments. Here’s a quick table to help diagnose common issues:
| Issue | Possible Cause |
|---|---|
| Sticking | Debris in track |
| Resistance | Misaligned screws |
| Noise | Loose components |
By carefully checking the movement, you ensure that the sun visor functions as intended, providing you with the necessary protection while driving.
Ensuring Stability
Stability is key for a sun visor. It should stay in place without wobbling or dropping unexpectedly. Follow these steps to ensure stability:
- Check Screws: Ensure all screws are tight. Loose screws can cause the visor to wobble.
- Test Hold: Place the visor in different positions. It should hold firmly without falling.
- Inspect Clips: If your visor uses clips, ensure they are secure and undamaged.
- Feel for Play: Gently wiggle the visor. There should be minimal movement.
Stability issues can often be resolved by tightening screws or realigning the visor. If the visor still wobbles, consider adding a small washer to improve fitment.
Ensuring stability not only enhances functionality but also improves safety. A stable sun visor won’t distract you while driving, providing a secure and comfortable ride.
Frequently Asked Questions Of How To Fix Sun Visor In Car
Q1: How do you fix a sun visor that keeps falling down?
A1: You can fix a sun visor that falls. First, try to tighten the main screw. The screw holds the visor in place. This often fixes a loose sun visor for good. If it is still loose, you may need a new clip.
Q2: Can a car sun visor be fixed?
A2: Yes, a car sun visor can often be fixed. Small issues are easy to fix at home. You can fix a loose screw or a broken clip. For a bad break, you may need a new sun visor. It is an easy fix or a simple swap.
Q3: How much does it cost to fix a sun visor in a car?
A3: To fix a sun visor cost can be low. A DIY fix can cost just a few dollars. You might just buy a new screw. A new sun visor part costs more. To pay a mechanic to fix it will cost more. The total cost can be from $20 to over $150.
Q4: Can you replace a sun visor yourself?
A4: Yes, you can replace a sun visor yourself. It is an easy job for most people. You just need a few tools. Usually, you just need a screwdriver. The fix takes about ten minutes to do. You can save money on a mechanic fee.
Q5: What is the easiest way to fix a loose car sun visor?
A5: The easiest way to fix a loose visor is to tighten a screw. Find the screw at the base of the visor. Turn it to the right to make it tight. This simple fix can solve the problem fast. It is the best first step to try.
Conclusion
To conclude, fixing the sun visor in your car is a simple task that can save you from the frustration of a drooping or broken visor. By following the steps outlined in this guide, you can easily troubleshoot and repair the issue.
Remember to gather the necessary tools, such as a screwdriver and replacement parts if needed. Start by locating the mounting points and removing the old visor. Then, attach the new visor by aligning it with the mounting holes and securing the screws.
Finally, test the visor to ensure that it operates smoothly and stays in place. Taking the time to fix your sun visor not only improves functionality, but also enhances your driving experience. So, don’t let a faulty visor hinder your view any longer – take action and enjoy clear visibility on the road ahead.