
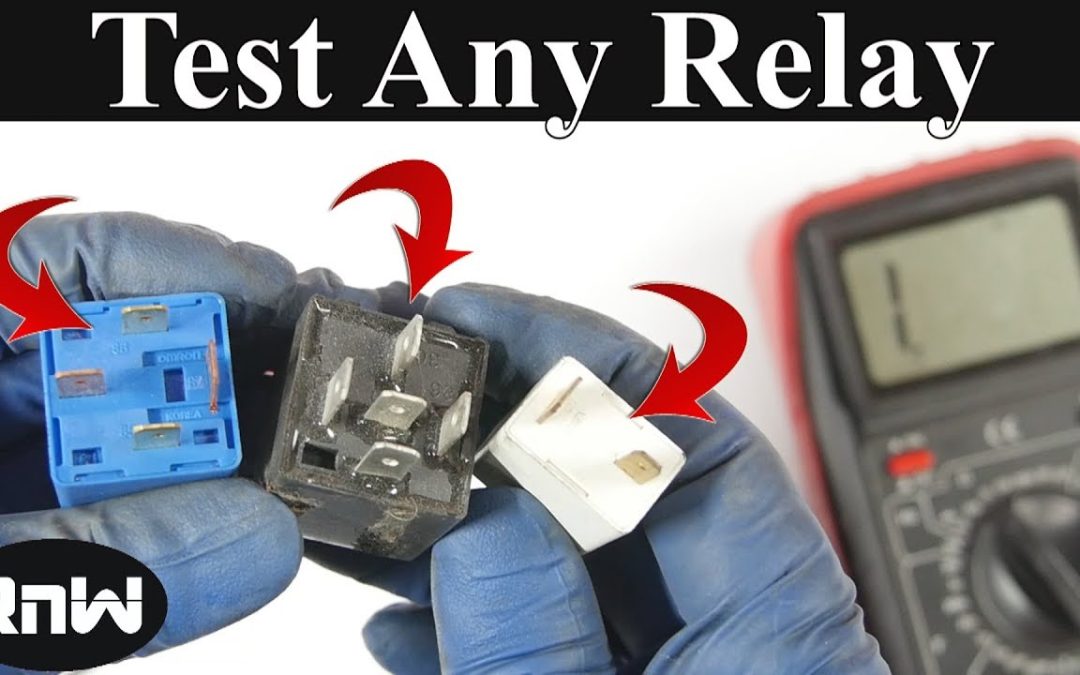
This article was updated in September 3, 2023 with new products and information by Mark S. Taylor
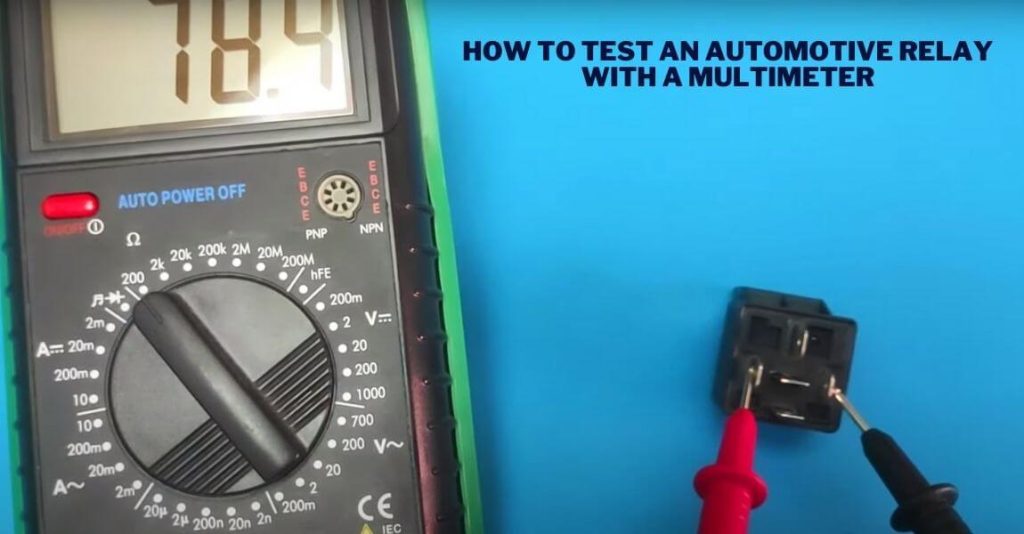
To test an automotive relay with a multimeter, follow the steps below. First, set the multimeter to the continuity or resistance mode.
Then, connect the multimeter leads to the relay terminals and check for continuity. If there is no continuity, the relay may be faulty. Testing an automotive relay is crucial for diagnosing electrical issues in vehicles. A multimeter is a versatile tool that can be used to test various components, including relays.
By following a few simple steps, you can use a multimeter to determine if an automotive relay is functioning properly or if it needs to be replaced. This guide will provide you with step-by-step instructions on how to test an automotive relay using a multimeter.
Contents
Understanding The Basics Of Automotive Relays
Automotive relays are essential components in a vehicle’s electrical system. They play a crucial role in controlling various electrical devices, such as headlights, fuel pumps, and cooling fans. Understanding how automotive relays work is essential for any car enthusiast or DIY mechanic.
In this section, we will delve into the key aspects of automotive relays, covering what they are, how they function, and their role in a vehicle’s electrical system.
What Is An Automotive Relay?
- An automotive relay is an electrical switch that allows a low-voltage signal to control a higher-voltage circuit. It acts as an intermediary between a low-power signal and a high-power device, enabling efficient communication between the two.
- Relays are typically used to control essential systems in a vehicle, including lighting, motors, and fans. They ensure that these systems receive the necessary power to function properly.
- Relays come in various shapes and sizes, but most feature a small electromagnet that, when activated, closes or opens a set of contacts, completing or breaking the circuit.
How Does An Automotive Relay Work?
- Automotive relays consist of several components, including an electromagnet, a set of contacts, a coil, and a housing. When a voltage is applied to the coil, the electromagnet attracts the contacts, closing or opening the circuit.
- When the electromagnet is deactivated, the spring force pushes the contacts back to their original state, either closing or opening the circuit, depending on the relay type.
- Relays can be either normally open (no) or normally closed (nc), depending on their default state without external input.
- When the coil receives power, the magnetic field generated activates the relay, causing the contacts to change position and connect or disconnect the circuit.
The Role Of An Automotive Relay In A Vehicle’s Electrical System
- Automotive relays play a critical role in managing a vehicle’s electrical system by controlling power flow to various components. Some of the key functions of relays in a vehicle include:
- Protecting sensitive electronic devices by isolating them from high current circuits.
- Allowing remote operation of electrical components, such as unlocking car doors with a key fob.
- Preventing damage to the vehicle’s wiring system by using relays as fuse protectors.
- Activating/deactivating high-power devices, such as cooling fans or fuel pumps, based on specific conditions.
- Providing safety features by automatically shutting off power in the event of a malfunction or short circuit.
- Improving overall system efficiency by reducing the load on control switches and other components.
As a car enthusiast or DIY mechanic, understanding the basics of automotive relays is essential for diagnosing and troubleshooting electrical issues in your vehicle. By grasping the fundamentals of how relays function and their role in a vehicle’s electrical system, you’ll be better equipped to handle any electrical challenge that comes your way.
So, let’s dive deeper into the testing process in the next section.
Preparing For The Test
It is important to properly prepare before testing an automotive relay with a multimeter to ensure accurate results and maintain safety. Before diving into the test, gather the necessary tools and equipment. Follow these steps to get ready for the test:
Gathering The Necessary Tools And Equipment
- Multimeter: Obtain a digital multimeter, which will be used to measure voltage, resistance, and continuity.
- Safety gloves and goggles: Wear protective gloves and goggles to protect yourself from any electrical mishaps.
- Screwdrivers or pliers: Use screwdrivers or pliers to remove any necessary components to access the relay.
- Vehicle manual: Refer to your vehicle’s manual to locate the relay and understand its functions properly.
- Replacement relay: If the relay is found to be faulty, having a replacement relay on hand can be convenient.
Ensuring Safety Precautions Are Followed
When dealing with electrical components, it is crucial to prioritize safety. Here are some essential safety precautions to bear in mind:
- Disconnect the battery: Before accessing the relay, make sure to disconnect the vehicle’s battery to avoid any accidental electrical shock.
- De-energize the relay: With the battery disconnected, turn off the ignition and any electrical components that may be connected to the relay.
- Let the system cool down: Allow the vehicle’s engine and electrical system to cool down before attempting to test the relay to prevent burns or injury.
- Handle the relay gently: Relays are delicate components, so handle them with care to avoid any damage during the testing process.
Locating The Relay In Your Vehicle
Before proceeding with the test, it is crucial to locate the relay in your vehicle accurately. Follow these steps to find the relay:
- Reference the vehicle manual: Consult your vehicle’s manual to identify the location of the relay. It will provide specific details and diagrams to make your search easier.
- Engine compartment: Relays are commonly found in the engine compartment, typically in the fuse box or relay box. Look for a black box with multiple relays inside.
- Under the dashboard: Some relays may be located under the dashboard, near the steering column or fuse panel. Check for any access panels or covers.
- Follow electrical connections: Trace the electrical wiring from the component the relay controls and look for a connection point where the relay should be.
Once the relay is located, you are ready to proceed with the testing process. By preparing adequately, following safety precautions, and familiarizing yourself with the relay’s location, you can ensure a smooth and accurate test.
Testing The Automotive Relay
Step-By-Step Guide On Using A Multimeter To Test The Relay:
Now that you have gathered all the necessary tools, it’s time to start testing the automotive relay. Follow this step-by-step guide on using a multimeter to ensure the relay is in proper working condition.
Step 1: Power off – Before testing the automotive relay, make sure that the power to the vehicle is turned off. This will prevent any accidents or electrical mishaps during the testing process. Safety should always come first!
Step 2: Access the relay – locate the automotive relay in your vehicle. It is usually found in the power distribution box, which is typically located near the battery or under the hood. Consult your vehicle’s manual if you’re having trouble finding it.
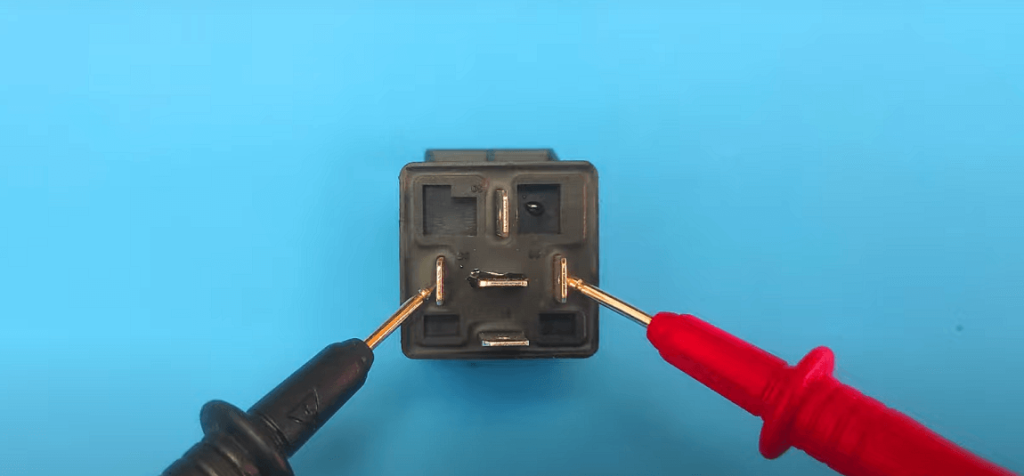
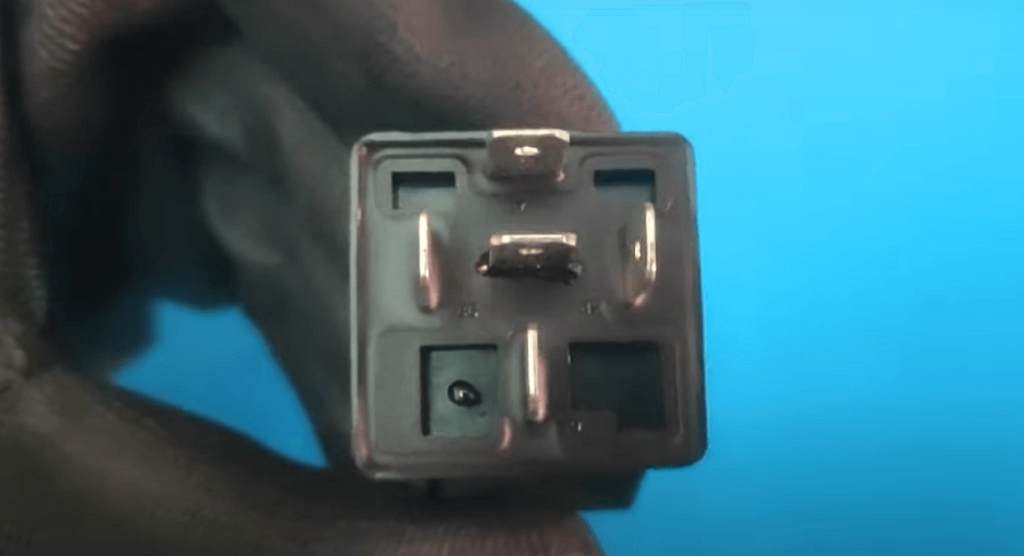
Step 3: Identify the relay pins – take a closer look at the relay and locate the pins. These pins are usually labeled with numbers or letters. Familiarize yourself with the pin layout to ensure proper testing.
Step 4: Set the multimeter – set your multimeter to the resistance or continuity mode. This mode is usually denoted by a symbol that resembles an arrow or sound waves. Refer to your multimeter’s manual for specific instructions on setting the mode.
Step 5: Testing the relay’s coil resistance –
- Connect the multimeter’s probes to the coil pins of the relay.
- Note the resistance displayed on the multimeter.
- Compare the measured resistance with the manufacturer’s specifications.
- If the resistance is significantly different, it may indicate a faulty coil.
Step 6: Testing the relay’s contacts for continuity –
- Connect the multimeter’s probes to the common (c) and normally open (no) pins of the relay.
- Check for continuity on the multimeter.
- A reading of zero or low resistance confirms that the contacts have continuity.
- Repeat the testing process for the common (c) and normally closed (NC) pins.
- Any continuity between the contacts, when the relay is not energized, may indicate a faulty relay.
Step 7: Testing the coil functionality –
- Apply power to the relay coil by connecting the battery voltage across the coil pins.
- Listen for a clicking sound, indicating that the coil is functioning properly.
- If you hear the clicking sound, it means the relay is activating and deactivating correctly.
Step 8: Verifying the contacts functionality –
- Apply power to the coil and check the continuity between the common (c) and normally open (no) pins.
- The continuity should be present when the coil is energized.
- Repeat the same process for the common (c) and normally closed (NC) pins.
- There should be no continuity between these pins when the coil is energized.
Step 9: Check for proper vibrations –
- Activate and deactivate the relay a few times.
- While doing so, check for any signs of proper vibrations.
- If you feel the relay vibrating, it indicates normal functioning.
Step 10: Interpret the results – based on the resistance, continuity, coil functionality, and vibrations observed during testing, you can determine the condition of the automotive relay. If any tests indicate a faulty relay, it is recommended to replace it with a new one.
Remember, testing the automotive relay helps diagnose potential issues in your vehicle’s electrical system, ensuring smooth and efficient functioning. By following this step-by-step guide, you can easily test the relay using a multimeter and troubleshoot any problems that may arise.
Interpreting The Test Results
Understanding The Different Possible Test Outcomes
When testing an automotive relay with a multimeter, it’s important to interpret the test results correctly to determine the relay’s functionality. Here are the different possible test outcomes and what they imply:
- Continuity: If the multimeter shows continuity (a beep or a low resistance reading) when testing the relay’s coil terminals, it indicates that the coil is intact and the relay is functioning properly.
- Open circuit: If there is no continuity when testing the coil terminals, it suggests an open circuit. This means that the coil is either damaged or disconnected, and the relay needs to be replaced.
- Short circuit: In the case of a short circuit, the multimeter will display a very low resistance reading when testing the relay’s coil terminals. This indicates that there is a problem with the coil, and the relay should be replaced.
- Inconsistent resistance: When the multimeter readings fluctuate or show inconsistent resistance values, it may suggest a faulty relay. This can occur due to internal damage or worn-out contacts within the relay.
Identifying A Faulty Relay Based On The Test Results
Based on the test results obtained from the multimeter, there are a few ways to determine if a relay is faulty. Here’s what to look out for:
- No click sound: During the testing process, if the relay fails to produce a distinct click sound when power is applied, it suggests that the coil is not activating. This may indicate a faulty relay that needs to be replaced.
- Burned or damaged contacts: If the relay’s contacts appear burned, melted, or damaged in any way, it is a clear sign of a faulty relay. Damaged contacts can cause the relay to malfunction or fail completely.
- Stuck or sticking contacts: Sometimes, the relay contacts may get stuck in a closed position even when the coil is not energized. This can result in electrical issues and potential damage to other components. If the contacts do not open when the coil is not activated, it indicates a faulty relay that should be replaced.
- Erratic behavior: If the relay exhibits erratic behavior, such as intermittent operation or failure to operate consistently, it may indicate a faulty relay. In such cases, it’s best to replace the relay to ensure proper functioning of the automotive system.
Troubleshooting Further If The Relay Is Working Properly
If the relay passes the tests and appears to be working properly, but the automotive system is still experiencing issues, further troubleshooting is necessary. Here are a few steps to take:
- Check the wiring: Ensure that the wiring connections to the relay are secure and properly connected. Loose or faulty connections can cause intermittent issues even if the relay itself is functioning correctly.
- Inspect related components: Examine other components, such as fuses, switches, and connectors, that are part of the circuit controlled by the relay. Faulty or damaged components can hinder the relay’s performance, so it’s essential to check their condition.
- Verify power supply: Confirm that the relay is receiving the appropriate power supply. Low voltage or incorrect power supply can affect the relay’s operation and lead to system malfunctions.
- Consider environmental factors: Assess environmental conditions that may impact the relay, such as high temperatures or excessive moisture. Extreme conditions can affect the relay’s performance, so protective measures may be necessary.
By understanding the different possible test outcomes, identifying faulty relays, and troubleshooting further if the relay is working properly, you can ensure the efficient and reliable functioning of the automotive system. Remember to always prioritize safety and refer to professional guidance when needed.
Common Issues And Solutions
Troubleshooting Common Problems With Automotive Relays:
Automotive relays play a crucial role in the electrical system of your vehicle, helping to control various components such as the headlights, AC compressor, or fuel pump. However, like any other electrical device, relays can encounter issues over time. If you’re experiencing problems with your vehicle’s relay, here are some common problems and their solutions:
- No power to the relay: If your relay is not receiving power, it won’t be able to function properly. Check for blown fuses or loose connections in the power supply circuit. Ensure that there is voltage reaching the relay.
- Relay clicks but doesn’t engage: If you hear the relay clicking but the component it’s supposed to control doesn’t activate, there might be a problem with the relay coil. Use a multimeter to test the coil resistance, and if it’s outside the specified range, replace the relay.
- Continuously activated relay: Sometimes, a relay may get stuck in the closed position, causing a component to stay on even when it should be off. This can drain your battery or lead to other issues. Test the relay’s control circuit using a multimeter to check if the relay is receiving a signal when it shouldn’t. If it is, replace the relay.
- Intermittent operation: If the relay works sporadically, turning on and off unpredictably, it could be due to a loose connection, a faulty relay socket, or worn-out contacts. Check the wiring and connections for any signs of damage or corrosion. Replace the relay or the socket if necessary.
Replacing A Faulty Relay:
If you’ve determined that your automotive relay is faulty and needs to be replaced, follow these steps:
- Start by identifying the faulty relay. Refer to your vehicle’s owner manual or a relay diagram to locate the specific relay you need to replace.
- Disconnect the negative terminal of the battery to ensure safety while working on electrical components.
- Gently remove the faulty relay by pulling it straight out from the socket. Avoid excessive force to prevent damage to the relay or socket.
- Inspect the relay socket for any signs of corrosion or damage. Clean or replace the socket if necessary.
- Insert the new relay into the socket, ensuring it is properly aligned. Push it in firmly until it is seated securely.
- Reconnect the negative battery terminal and test the new relay by activating the component it controls. If everything works as expected, you have successfully replaced the faulty relay.
Preventive Measures To Avoid Relay Failure:
To minimize the risk of future relay failure, consider these preventive measures:
- Regular maintenance: Include relay inspection as part of your vehicle’s regular maintenance routine. Check for loose connections, corrosion, or any signs of wear.
- Ensure proper relay rating: Always install relays that are matched to the specific electrical requirements of the components they control. Using an under-rated or over-rated relay can lead to premature failure.
- Protect from excessive load: Make sure the relay is not continuously subjected to excessive electrical loads. Use appropriate fuses, circuit breakers, or resistors when necessary to protect the relay and its contacts.
- Keep it clean: Keep the relay and its surrounding area free from dust, debris, and moisture. Regularly clean the relay contacts to prevent corrosion.
- Check the wiring: Inspect the wiring connected to the relay for any signs of damage or fraying. Replace any worn-out or damaged wiring promptly to avoid potential relay issues.
By troubleshooting common problems, replacing faulty relays, and implementing preventive measures, you can ensure the reliable operation of your automotive relays. Regular inspection and maintenance will help you catch issues before they become major problems, allowing you to enjoy a trouble-free electrical system in your vehicle.
Frequently Asked Questions For How To Test An Automotive Relay With A Multimeter
Can You Test An Automotive Relay With A Multimeter?
Yes, you can test an automotive relay with a multimeter. By using the multimeter’s ohmmeter function, you can check the continuity of the relay’s terminals. Additionally, you can use the multimeter’s voltage function to test the relay’s coil voltage and ensure it is within the manufacturer’s specified range.
How Do You Check If An Automotive Relay Is Working?
To check if an automotive relay is working, you can use a multimeter to test its functionality. First, you can test the continuity of the relay’s terminals using the ohmmeter function. Then, you can test the coil voltage using the multimeter’s voltage function.
If the relay shows continuity and the coil voltage is within range, it is likely working properly.
Why Is It Important To Test An Automotive Relay With A Multimeter?
Testing an automotive relay with a multimeter is important to ensure its proper functioning. By using a multimeter, you can identify any faults or issues with the relay before they cause problems in your vehicle’s electrical system. Regular testing can help prevent potential malfunctions or breakdowns.
Conclusion
Testing an automotive relay with a multimeter is a crucial skill for any car owner or automotive technician. By following the steps mentioned in this blog post, you can easily determine whether a relay is functioning correctly or not. Remember to ensure safety by disconnecting the battery before starting the testing process.
Start by identifying the relay and then testing the coil and contacts for continuity using a digital multimeter. Pay attention to the manufacturer’s specifications and refer to the electrical diagram if needed. By practicing this method, you can avoid unnecessary replacements and save both time and money.
So, don’t hesitate to give it a try the next time you encounter an automotive relay issue. Stay knowledgeable, confident, and in control of your vehicle’s electrical system. Keep driving safely!